Trestle restoration
#16
From my limited experience (very, very small) with modular layouts, usually there is a prescribed depth of module and an explicit track interface distance from the back of the module to adapt to the partner modules. I think the only other critical dimension would be track height from floor level, and (obviously) track scale. I'm thinking that once finished, that module would certainly be a highlight for the club!
Check out my "Rainbows in the Gorge" website: http://morristhemoosetm.wixsite.com/rainbows
Reply
#17
Thank you. I'm on hold for now until it's decided what will be done with the trestle.
Reply
#18
I've decided to build a modified free-mo module for the trestle. When I say modified, it means that standerd free-mo modules are 2' wide. I won't be able to do that because of space constraints where the module will be stored at home. Instead that module will be 4' long and 1' wide. This also means that my original stand/display frame work will be replaced.


I began with a 1/2" plywood sheet, cut 1 X 4',  and some 2" strip to box the base in from the bottom. 


Then I fabricated the end plates out of 3/4" plywood, standard for free mo. THe holes cut in the plates are 6" from the top which will make them line up with a standerd module.


with the Module 48" long and the trestle 41 1/2" long there's only a few inches on each side to spare. I cut two pieces of 1/2" birch plywood to serve as subroadbed on each side and the long  piece of plywood is representing the trestle length. There's a number of things I have to figure out yet. Free-mo requires that you have a digitrax UP-5 installed on each side of the module. So I have to figure out where to fit that, and I also have to come up with removable legs of some sort.
Reply
#19
Well that stinks. A lot of nice plywood went into that support structure. I guess you'll be forced to modify the trestles to accommodate the 4' restriction?
Check out my "Rainbows in the Gorge" website: http://morristhemoosetm.wixsite.com/rainbows
Reply
#20
Well, it wasn't a total waste. It at least gives me a model to work with on the module.

I won't be modifying the trestle as the trestle is abut 5" shorter than the module. I'l still be able to mount the trestle, add about 1 1/2' of track on each end and still have the required 1" for the adapter rails.

I managed some assembly and some figuring out this afternoon.


I attached the two end plates and the birch sub roadbed. I then tested the gap with my trestle stand-in. It pinched in about 1/16" but I can work with that. I also came up with a solution for getting space for the UP-5's:


Instead of ading an individual narrow riser for each trestle bent, the first two or three bents will be supported by 1/2" plywood coming from the sides  with a bridge between. This will also keep the end plates square.
   

I'll first cut the relief for the 1X1 on the end plate, then start to determine the 'terracing' of the side plates.


I then got the trestle outside and into place to visualize how things were going to fit. the trestle is a bit low 3/4- 1" but I planned on that so I can add the river on the bottom of the module by adding the apporpriate amount of foam.
Reply
#21
Progressing slowly, We've had a heat wave for the past week here (yes we do get hot summers in Canada) and I've been doing all my carpentry work in the garage.
   

I cut the profile boards for the end tiers, I screwed them together in pairs so the would be cut out the same.


After cutting them out I checked my cuts with the orginal base. They might be a bit short, but the 1/2" steps will be on top of the and any difference after can be fixed with shims or foundations for the trestle bents. At this point I also cut out the steps, they were all 12" long but varied from 2"- 3" wide.


Yesterday morning I attached the profile boards and placed the steps loosly on them. I wanted to check the fit with the trestle before tacking enverything together permenatly. I also cut some cork roadbed to get the correct track height. I'm quite happy with how it turned out. When I added the profile boards, they squared the end plates with the base, giving me the 1/16" the was pinching in before. I also found that the Trestle did have to be shimmed up just a bit which also gave me 1/2" on the bottom so I can add some foam for scuplting the creekbed in. 
   

So I'm happy with how it's turned out so far. When I finished checking I pulled it aparts and started to do some painting:


Another local modeler who built his free-mo module a few years ago painted the underside of his in white. It give a nice clean look and makes things easier to see if you need to check on something at a show.  I have a bit more of underside to paint in white, since that includes the insides of the ends
   

After the paint has cured, I'll attach the steps.


Today I got a piece of 1/2" foam that I'll cut down for the bottom and possibly on some of the steps.
Reply
#22
Progress!


I cut the riverbed into the foam and glued it down.


Then I attached all the steps to the profile boards and while I was at it I cut the holes for the UP-5's. I glued the foam down with weldbond and added the paint cans for weight.


With the messy carpentry done, I'm able to do the rest of the work in the house. I cleared off my yard section on my layout and covered it with some plastic garbage bags. It's much easier to work on now that its higher and in a fairly well lit and cooler environment.


I spent the next couple days cutting and glueing foam panels in for roughing in the scenery. All the trestle bents have their own supports now, they just need some shimming with will happen next. I hope to begin roghing in the plaster cloth shortly but I'm thinking I should wait until my wiring is done.

   
Reply
#23
Now, that's built for traveling! I'm looking forward to the scenic additions!
Check out my "Rainbows in the Gorge" website: http://morristhemoosetm.wixsite.com/rainbows
Reply
#24
I made a fair amount of progress on the module in the past couple weeks. I haven't been posting for a couple reasons but I thought I'd bring you all up to date.
   
I finally got my wiring harness. It's pretty simple, 5 bus wires with terminal strips to ancor them to the module and conectors on each end.
   

The bus wires and color coded: Red and Black for track power, Blue and white for accessories (switch machines, lighting) and the green for the booster ground.  I attached feeders to the track busses but since I don't have any accessories I left the others untouched.


I routed the wiring harness under the module using some wiring brackets, I did the same with the loconet cable that will tie the two UP-5's together.
With that done I went back to the scenery.


I added a bit more foam blocking and carved it with my hot wire cutter.


I'm pretty happy with how the basic land forms look so on the the next step. I also masked off the foundations for the trestle bents, these will later be painted concrete.
   

I covered all the hilsides with plater cloth. It's been a few years since I used the product and it never fails to inmpress me with have easy and clean the process it compares to the old paster soaked papaer towels.
 I went up the The abandonned Myra Canyon section on the Kettle valley Railway a couple weeks ago and took some photos of the trestles and especially the goundwork under the trestles. What I took away was that most of the slopes or tiers between the trestle bents are just that, slopes instead of vertical rock faces. So I've made a mix of slopes and rock cuts on mine.
   

I'll be going through my rock molds in the next while to figure out what to use on the rock work.
Reply
#25
A great foundation, Glen! We're looking forward to the scenery!
Check out my "Rainbows in the Gorge" website: http://morristhemoosetm.wixsite.com/rainbows
Reply
#26
Coming along nicely!
Tom
Silence is golden but Duct tape is silver
Ridley Keystone & Mountain Railroad
My Rail Images Gallery
Reply
#27
I thought I'd post some pictures that I took on the Myra Canyon section of the Kettle Valley Railway a few weeks ago. The section was abandonned in the mid-seventies with the rails pulled up in the late seventies. It soon became an informal hiking trail with 18 trestles and two tunnels. in 2003 there was a major forest fire in the area and most of the trestles burned but both the federal and Provicial goverments stepped in and had the trestles rebuilt to near original specs. The bents look almost the same but some of the lumber is slightly dimensionally smaller. 
It you are in the area, it's a good morning or afternoon trip. it takes about 30-45 minutes from downtown Kelowna and a bike ride from one end of tyhe canyon to the other and back is a couple hours (about 24 km)


This is the largest trestle in the Canyon, it was one that was destroyed and rebuilt. The one thing that I take away is there are no dramatic rock 'steps' between the trestle bents, just slopes with grass and other vegitation.
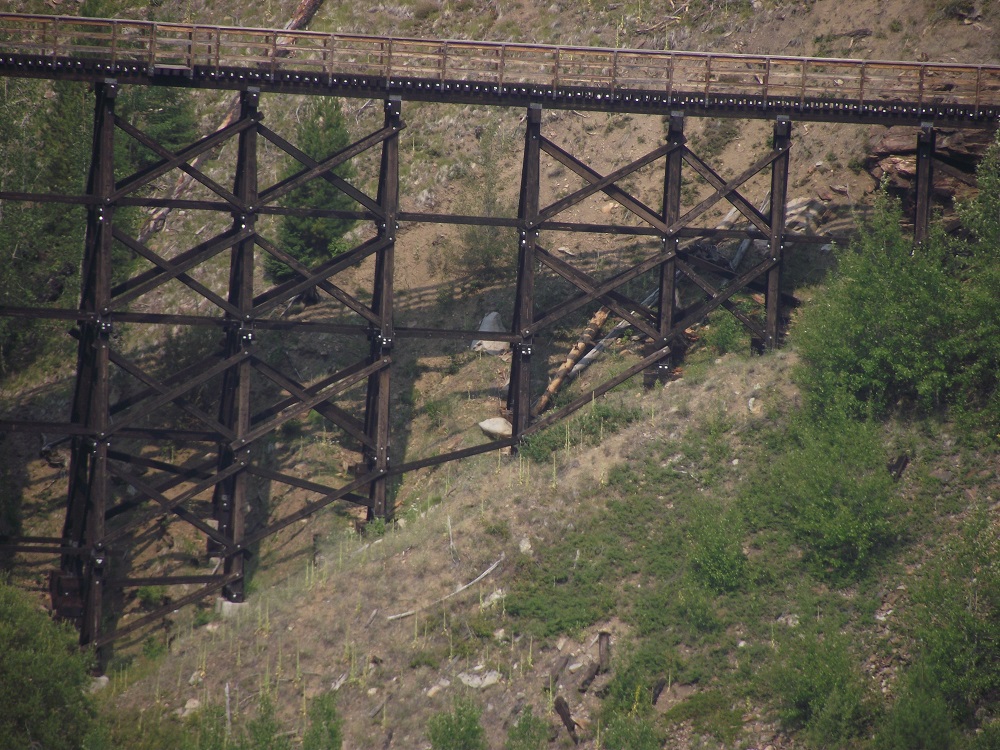
     

Another thing to notice is the concrete footings at the base of each bent. Even the surviving trestles have concrete footings. 


This is one of the original trestles. It too has concrete footings and fairly gentle slopes. This trestle had been dowsed with fire retardant to save it and was stained a redish color for a number of years afterward.


This is my Favorite Trestle in the Canyon. It's a very unique 's' shape and it has a mix of rock faces and slopes. This is the one that I study the most when I'm cycling through.
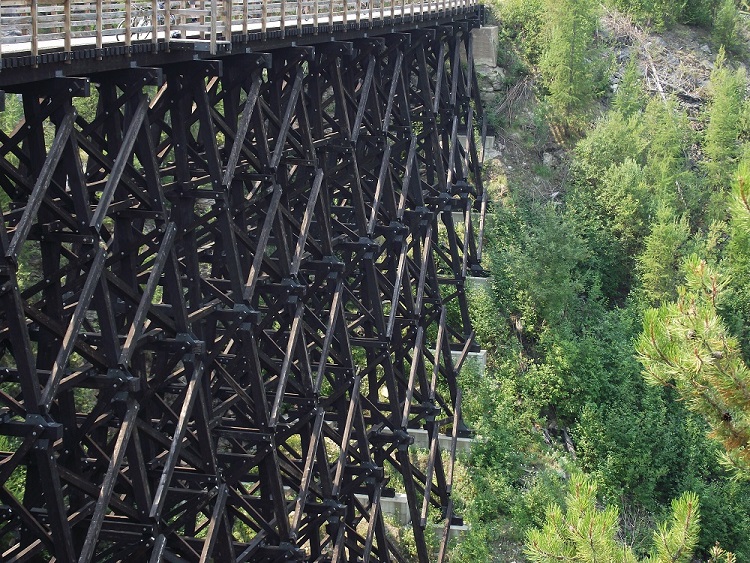
   

There is a very rough trail so I could climb down one side of trestle. That's my bike in the middle of the trestle. 
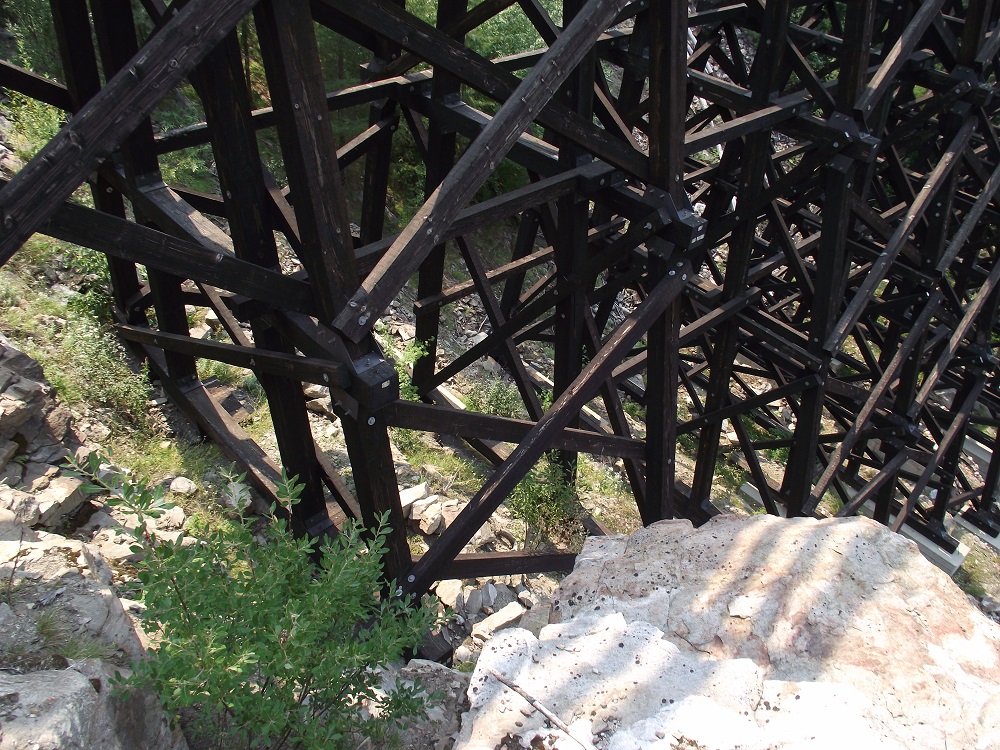
   

A look at the bottom of the bents and footings.
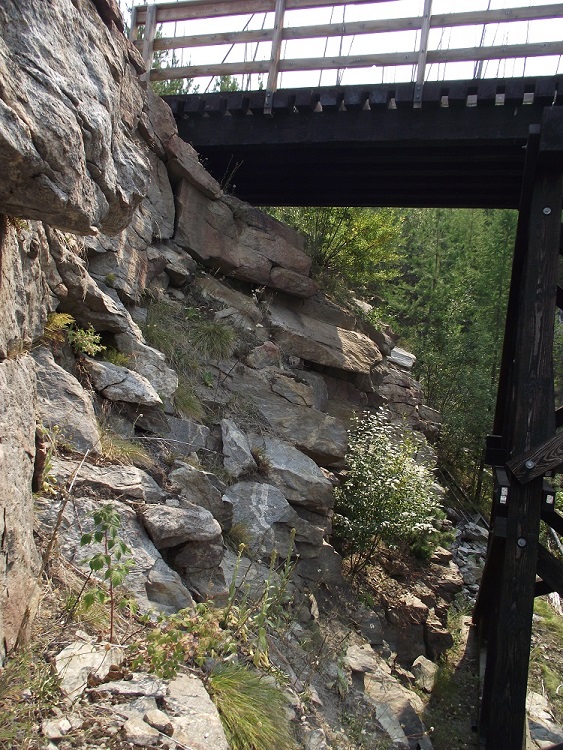
   

And the one end of the trestle. I saw that while this end had no real abuttment, the other side has a concrete abutment and other trestles had timber abutments. 
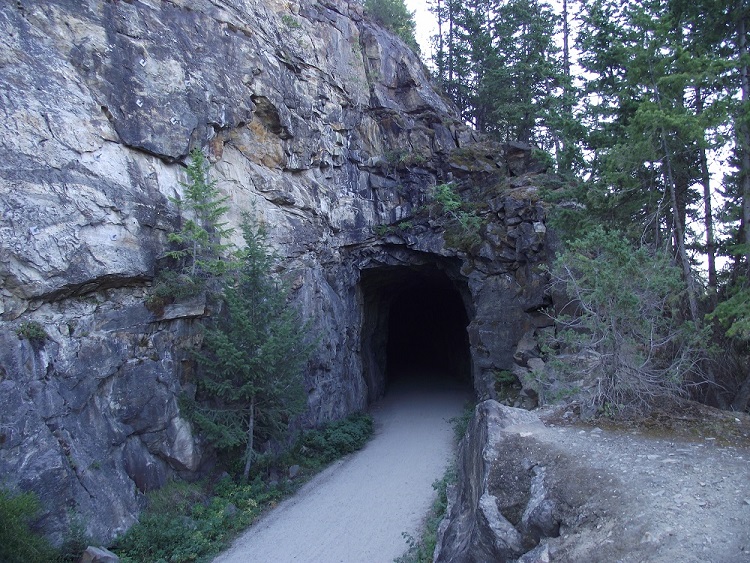
   

And even though I don't have a tunnel on the module, I thought I'd include a picture of one.
I'm planning on using this as inspiration on my home layout. I like the idea of a railway clinging to the side of a canyon running in and out of a tunnel on it's edge.
Reply
#28
That tunnel in the last shot reminds me of a couple of the tunnels running up to the Eagle's Nest above Berchtesgaden in Bavaria. Very cool. The first overall shot of the trestle would be a great inspiration for your own trestle module. I love the mix of stone and conifers.
Check out my "Rainbows in the Gorge" website: http://morristhemoosetm.wixsite.com/rainbows
Reply
#29
I don't know about the tunnels in Bavaria but these are great for study as the one you see here is rock on this side, a reconstructed wood portal on the other both , the other tunnel has a concrete portal on one end and rock on the other:
   

There was to be a third tunnel in the canyon but as they were digging it, the roof became compromised to instead it's a very deep cut. 
I understand that the tunnels and several rock faces are check yearly by geotechnical engineers to make sure they are relatively safe.

The conifers that you are refering to are less than 20 years old as that area was completly devastated by the fire in 2003. You can still see the dead burned trees in the photo.

I did the rockwork and plasterwork on the module today.
   

It was a mix of frustration at first, trying to get the rock castings to adhere. I think my mistake was not wetting the hydrocal casting and the plaster cloth before trying to attach the casting with a hydrocal paste/filler. The casting pulled all the moisture out of the paste and it dried almost instantly without attaching the casting to anything.
I did figure it out and after the castings were attached I shaped everything in with Woodland Scenics carving plaster.


I also used the plaster to shape the creekbed a bit more. 
It's not perfect but it's ready of color I reckon.
Reply
#30
And down the stretch they come!  Looking good, Glen.  I've always found that adhering rock structures is best done on something other than a smooth surface.  Foam also has a propensity to suck moisture - the stuff's almost like a sponge even if there's a barrier between it and what you're working on - but you conquered that particular beast.  Painting rocks is always done best with a cold beer handy - tip one for us!

Found a picture of the tunnel in Germany....


The Road – Das Kehlsteinhaus
Check out my "Rainbows in the Gorge" website: http://morristhemoosetm.wixsite.com/rainbows
Reply


Forum Jump:


Users browsing this thread: 1 Guest(s)