Interaction Hobbies Firefly Houseboat
#1
My Friend bought this kit a number of years back:
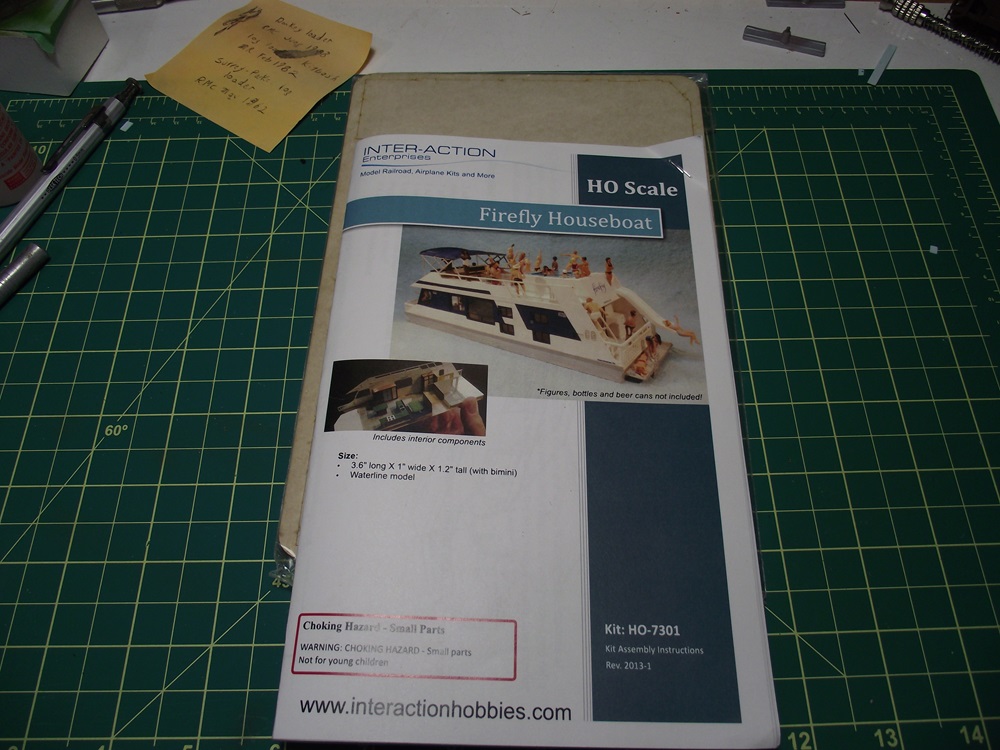
   

And after hanging on to it for this long he decided that he wanted me to build it for him. It's a pretty complicated kit, about 30 scale feet long with a complete interior.
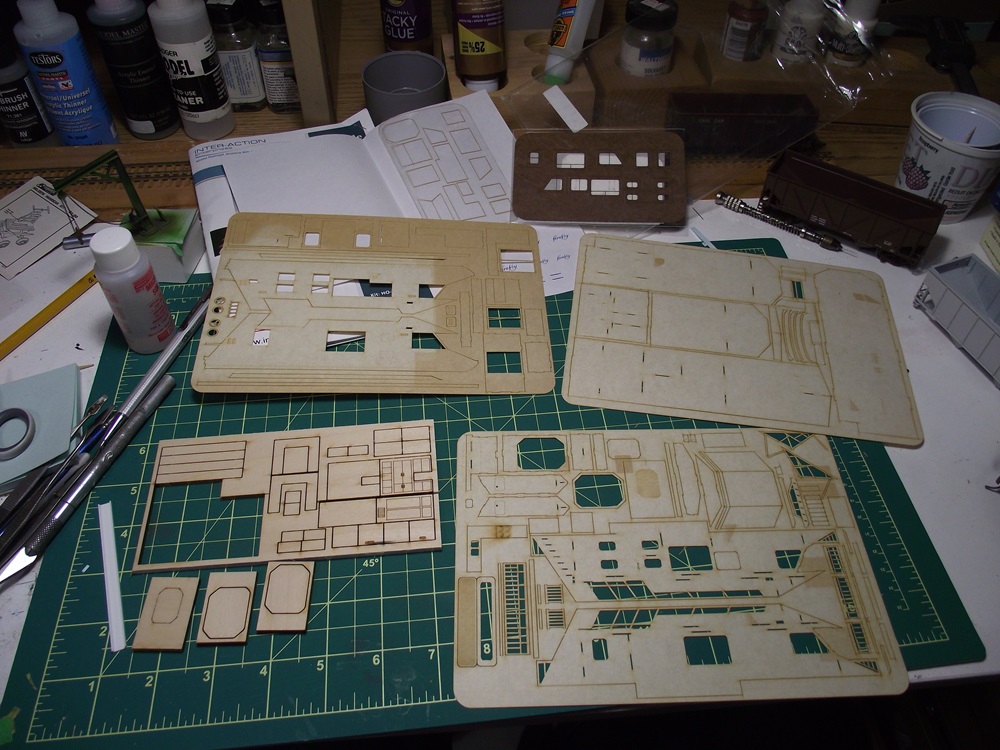
   

There are three sheets of laser cut wood, one small sheet of laser resin board, and one sheet of thicker laser cut basswood. as well as windows, material for the slide, and some printed lettering. The instructions are in color as well.
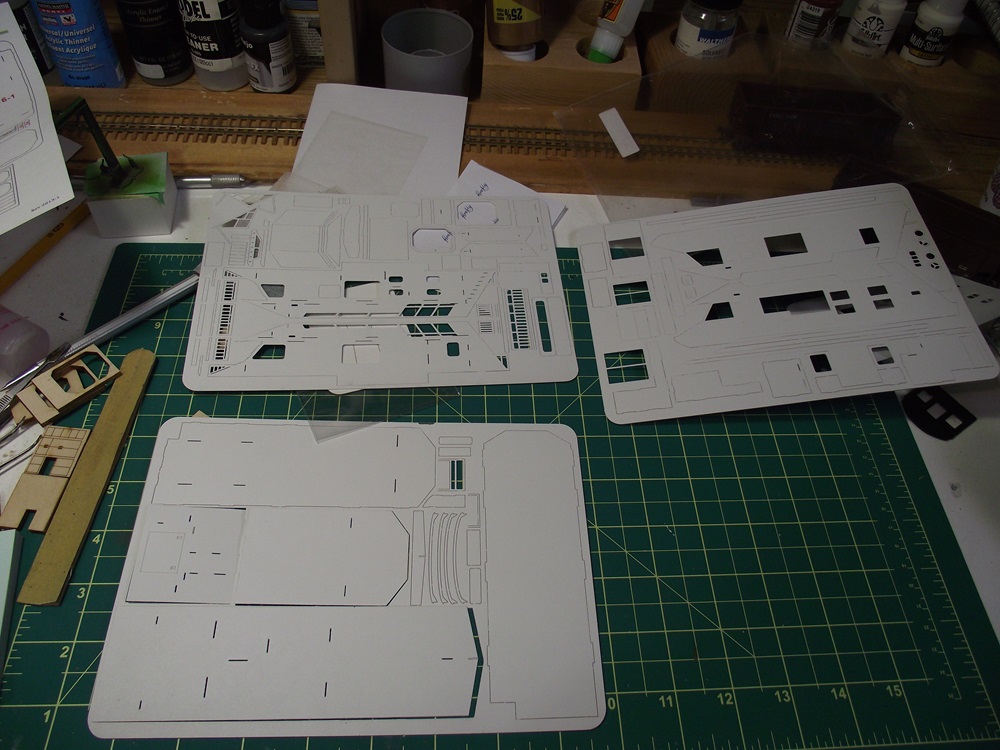
   

I started by painting the three sheets with flat white, seeing as most of the model will be white.


Then I masked and painted the three interior floor parts with gray and tan. I then scribed tile lines into then to simulate flooring.
I'm waiting for some paint to dry before I continure.
Reply
#2
A busy day with lots of progress. 
   

I put the interior floors together. The floors are on different levels so there's risers to install befor the flooring. I used some 1/8" square basswood for some extra strength for gluing. 


While that was drying I started to assemble the interior and exterior furniture. Mostly it's just doubling up the thicker basswood parts and sanding the edges. After that I painted all the parts in white.


Then I added the bedroom/ bathroom walls to the interior. the walls are very thin so I used some of the basswood squares to reinforce the joints.  I placed them in areas that won't be seen.


I then started to work on the exterior sides of the model. I plan to replicate the paint scheme on the packaging so I masked the sides using Tamiya masking tape.


and the finished sides. the kit has interior walls as well that you paint around the windows on the outside to show the window frames. I also painted the lower part of the hull in a silver, overcoated with clear flat to simulate aluminum.
   

By the time I was finished painting the sides, my glue on the floor had dried enough for me to start assembling the interior. The blue 'u' is the table seating, and there is cabinetry and a refrigerator on the other side of the boat.
Reply
#3
Great progress. Cool to see how itis coming together.
Tom
Silence is golden but Duct tape is silver
Ridley Keystone & Mountain Railroad
My Rail Images Gallery
Reply
#4
As a fan of the Firefly TV show, a outer space si-fi, I was wondering if this was in anyway a tie in to that show. It isn't but it looks like a fun project!
Mike

Sent from my pocket calculator using two tin cans and a string
Reply
#5
Glen, I admire your willingness to tackle these projects. This one is about 1000 steps above my best skill level. I look forward to the completed project. 
Charlie
Reply
#6
This kit reminds me that I need to get my Coke machine, phone booth, and Xmas tree sales stand kits from Interaction out and work on them this winter. Seeing your work is very inspirational, Glen!
Check out my "Rainbows in the Gorge" website: http://morristhemoosetm.wixsite.com/rainbows
Reply
#7
Glen to bad postage to Canada is too high i have several wood kits that i will never build that i would give to someone for the cost of postage.
Jim
Reply
#8
Thanks everyone

jim. Why don't you send me a list (PM) of what you have and the shipping? It might still be worth it.

I made some good progress on the houseboat .


I finished off the interior, adding the kitchen cabinents, table and island.


I'm not adding any figures or extra details to the interior as my friend will be displaying it on his free-mo module without interior lighting (the kit has instructions if you wish to add lighting)


I also finished up the two side walls. There's several layers to each wall to achieve the desired 3-d effect. Theres the inner and outer main walls, then the window frames and finally the window glass inself, all laser cut.


fliping the walls over, there is a long trim piece above the windows and the rub-rail along the top of the aluminum hull. I'm just waiting for my window adheisive to dry and then I can attach the walls to the floor/interior assembly.
Reply
#9
Moving right along.
   

I attached the side walls, one at a time. This is where I had a few problems. I found that the tabs and slots don't always fit together. This could be that I have paint on the tabs and now they don't fit into the slots as well. I started to take my side cutters and trim the tabs back so parts fit a bit better. 


I also lost a small wall piece from the back bedroom but it won't be noticable. I did have to re-attach one wall as I didn't line it up quiote right to begin with. I'm finding most of the problems are small mistakes that I've made that compound later, but it's nothing I can't deal with.


After the walls were set up, I added the first roof, and the front and rear walls, windows and doors. I had to clamp the roof in a couple places but everything went together okay in the end. There is a second roof/deck that sits above this one that I haven't added yet. The gap between the two roofs would be where you would add the lighting.


I also added the propane storage lockers in the back and some deck locker boxes in the front.

I'm going to continure to work on the houseboat until I get another package from Interaction. That contains a kit that I have to complete before Christmas and time is running short.
Reply
#10
Some more progress has been made.


I added the upper deck and the front slope pieces. I had noticed that there were slight gaps between the three slope sheets so I filled them with some extra glue, masked the rest of the boat off and repainted. don't worry about the gap between the one slope piece and dash, there is a piece of trim that will cover it later.


I then built up the rear steps and railing. This was a very finicky part of the build, trying to line everything up before gluing it all in. I ended up using some CA glue here, just to ensure that it will stay put. 


I also started on the upper deck's hot tub. It's made of a bottom that has been laser etched, and three basswood pieces that stack to make the tub. 


glued together, ready for painting.
Reply
#11
Great job, looks like a fun build. They make this in N scale too plus a few other kits that I'm contemplating getting thanks to your starting this thread....
Don (ezdays) Day
Board administrator and
founder of the CANYON STATE RAILROAD
Reply
#12
Likewise Don. Their kits look fun and pretty straightforward to build.
————————————————————————————
Modeling the East Broad Top as it was between 1937-1942
~Amanda
Reply
#13
Thank you. I would caution that this is probably one of the most challenging kits that I've built, so if you are looking at getting it, prepare yourself.

That being said, now that I finished the santa's Workshop kit. I went back to finish this one. I had planned to get this project done so I could give it to my friend for Christmas, but instead I gave it to him on Boxing day (Canadian holiday on Dec 26th)


When I last left off I had just assmebled the basic shape of the hot tub. I then painted the interior a medium blue and cut out all the overlays to the tub.


And with all the overlays applied. This is where things started to get easier. The hot tub fits into some slots in the rear upper deck and it's rear overlay covers the gap between the first floot ceiling and the second floor deck.


I also added the trim to the front of the dashboard, hiding the gap, and the two side benches. 


Then the driver's bench went together, and the steering wheel and control panel. 


Then the real challeng of the day, the Bimini top. There are six parts to the framework. If you are building this yourself, pay very close attention to the instructions as some of the parts look alike but they are not. I glued the framework together with thin CA so it would set up quickly.


After that set up I applied white glue to the top surface of the framework,


and applied the tissue paper to the top When that was set I soaked the tissue in diluted matt medium to stiffen it.
Reply
#14
This looks better and better each time I see it.
Tom
Silence is golden but Duct tape is silver
Ridley Keystone & Mountain Railroad
My Rail Images Gallery
Reply
#15
Thanks Tom.

I painted the bimini blue:
   

and finished off the hot tub:


The kit comes with a laser-cut peice of clear plastic that fits the top of the hot tub perfectly. I glued that in, added the tub surround and then used woodland scenics water effects to make ripples in the water. 


With that, there was only the rear swim deck, the upper deck gates and the slide to attach. The slide it given as a peice of straight 'c' channel. You need to place it in hot water to soften the plastic and then bend into the 's' shape you see here. 

And now it's finished.


In a few months we will be setting up our free-mo modules and the houseboat should  be in it's final place on my friend's. If I can I'll post some more pictures of it then.
Reply


Forum Jump:


Users browsing this thread: 1 Guest(s)