Posts: 9,747
Threads: 234
Joined: Dec 2008
Recently I have had time to make some of my own decals and the results have reached both ends of the spectrum. For the past 3 or 4 days I have been designing the decals I need for some custom lettered cars and I have had good results in the end.
The first step is measuring the model so the decals are the right size. Often these are really small. I have found that 300 DPI returns the best results. Smaller gets pixels and larger causes ink runs. I use photoshop Elements 20 and the sizes are easy to match.
I have found that the white decal paper is better for the colors but then you have to match the background. By doing a test print I realized the background colors need to be darkened to get a better match on the cars you are decaling.
I hve had some ink run no matter what I do and it doesn't show until the paper is coated with clear coat. I apply the clear with an air brush and thin it with lacquer thinner 50/50, applying the first coat dry and allowing it to set for a few minutes, then 2 more coats just slightly heaver with drying time between coats. Let this dry at least 24 hours.
When I did the final print of today's project I went a step farther and borrowed my wife's hair dryer and warmed up the printer and the paper and set it on low and kept the low heat on while the print ws coming out. I am hoping the ink will nor run at all with the warmer paper and printer. This is what I hope to have when everything is dry.
 I will continue when the ink is dry.
Charlie
Posts: 1,076
Threads: 31
Joined: Mar 2009
Charlie, those look amazing. I have thought about printing my own but don't know what program to use or anything. Can't wait to see those decals on some rail cars.
Posts: 219
Threads: 15
Joined: Nov 2015
I would also love to learn how to do custom decal making, so I am following with great interest.
————————————————————————————
Modeling the East Broad Top as it was between 1937-1942
~Amanda
Posts: 2,416
Threads: 63
Joined: Dec 2008
I just found a sheet of blank decal paper. Ive no idea what to do with it.
David
Moderato ma non troppo
Perth & Exeter Railway Company
Esquesing & Chinguacousy Radial Railway
In model railroading, there are between six and two hundred ways of performing a given task.
Most modellers can get two of them to work.
Posts: 9,747
Threads: 234
Joined: Dec 2008
As I said in my first post I use Photoshop Elements 2022 to make and size my decals. I am familiar with it and I have been using Elements for 20 years now. It will not do everything Photoshop will but you do not need to pay a yearly fee. I think previous versions will work though I can't remember for sure. Some of these previous versions can be had very reasonable on Ebay but if you buy be sure you get the product key because it will not run without it, and you will also have to instal a program from windows update to install the previous versions. MS Paint may work as well but I am not at all familiar with it.
The first thing you have to do is size the decal to fit your project That part is easy. If you need lettering that is prototype 9 inches tall you use 9/87 =0.103448 scale height. You can go up or down in size whatever serves you better.
Here is my main screen. I have started a new document that is 8 x 11 inches and is a resolution of 300 Dots Per Inch (DPI)

I will start by adding some text. Select the text tool (T) in the left column, chose the font from your font menu at the bottom of the page, them chose the font size (this will be changed to meet the needs in the nest step

Posts: 9,747
Threads: 234
Joined: Dec 2008
You will notice the text is small so the next step is to enlarge, (or reduce it) I do this by grabbing a corner of the move boy and stretching it diagonally to the size I want. In this case I will make it .5 inches high
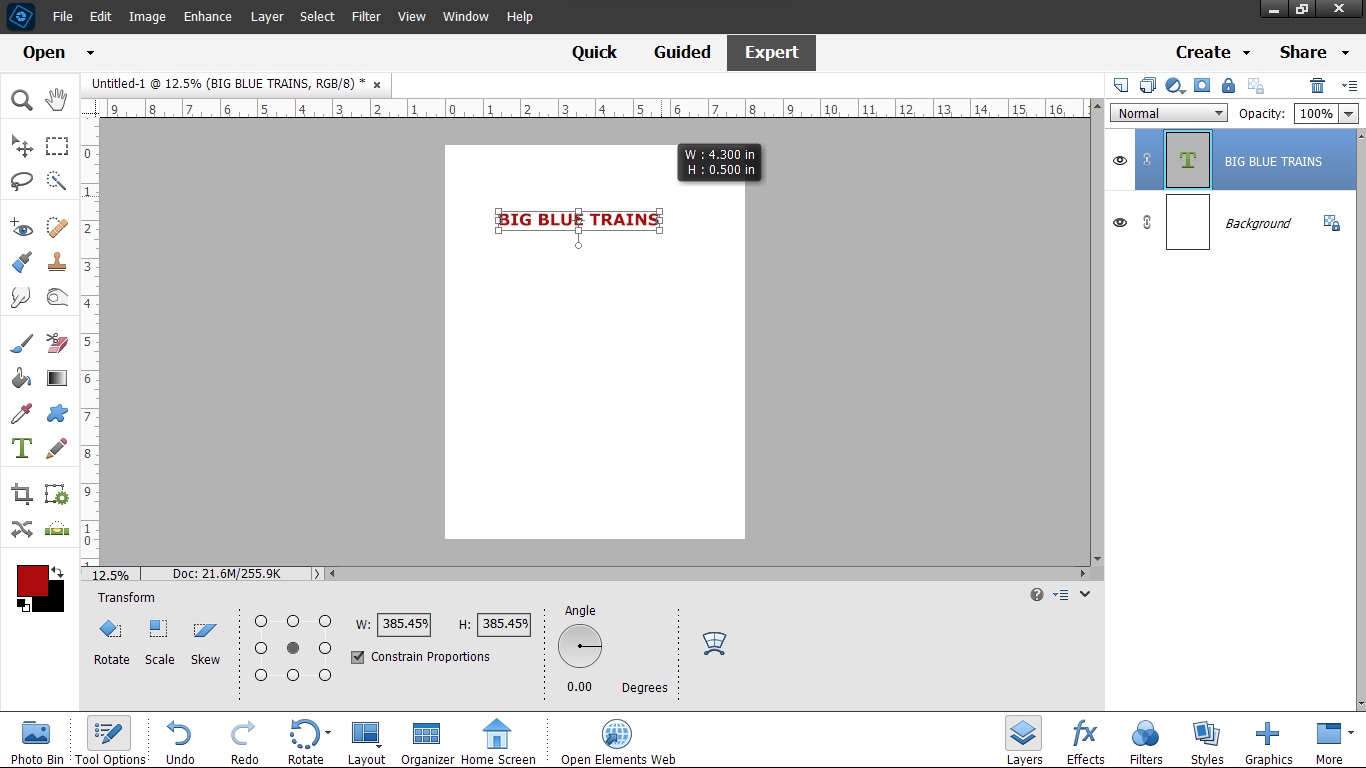
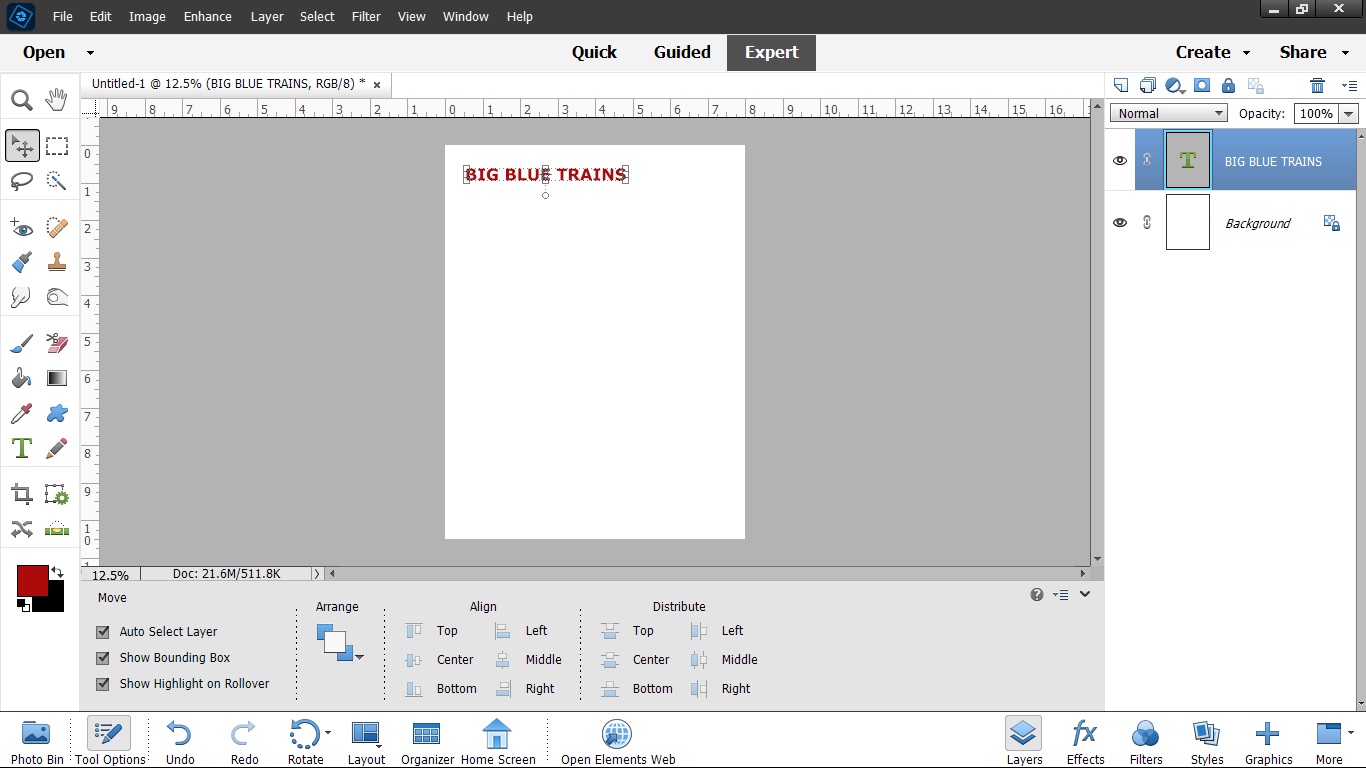
Once I have the size I need I move it to an area that won't waste space. To move it click in the box ar the center and hold the click to make the move then when it is where you want it click the OK checkmark Keep a 1 inch margin from the top because the sheet may not have decal above that area and a 1/2 inch at the sides and another inch at the bottom
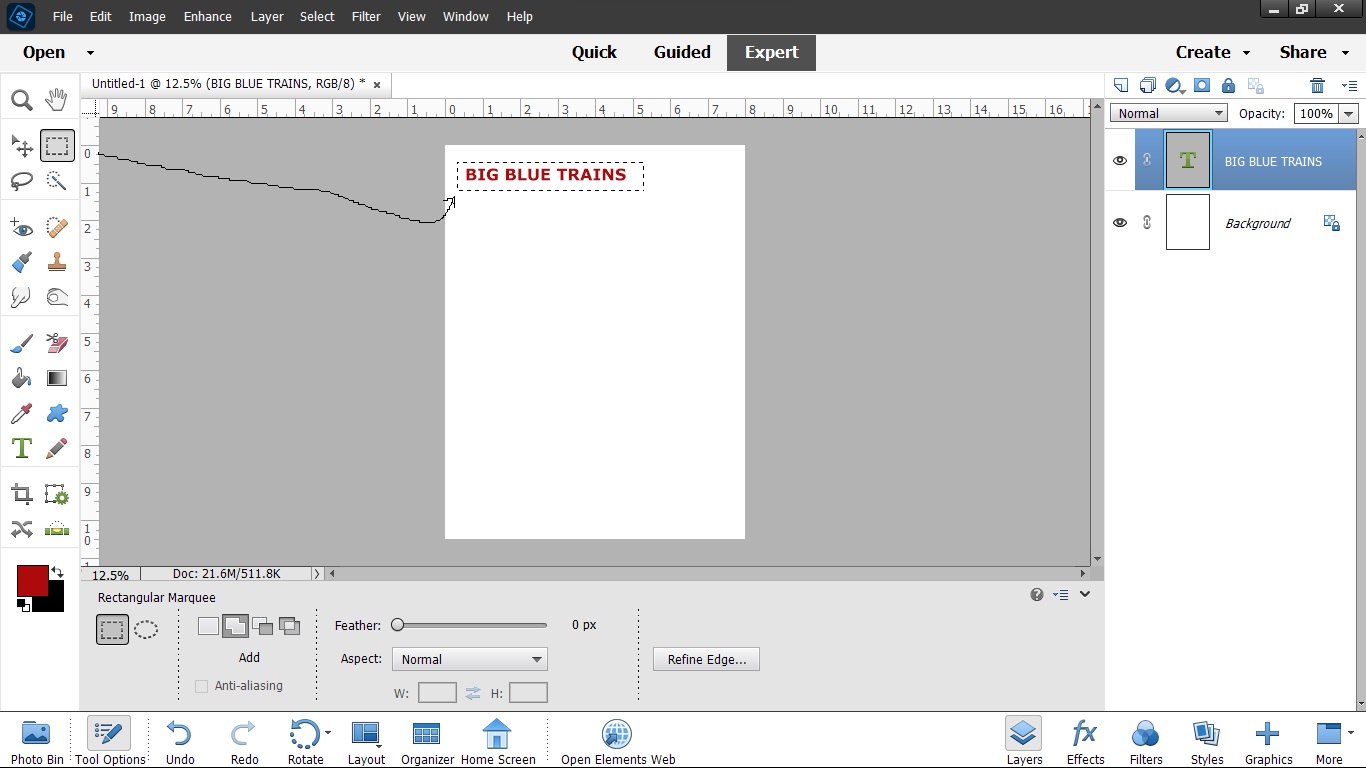
Now we know big blue uses white text on a blue background. I am doing this this way to show how easy it is to make changes. First I select a rectangle around the text. Do the background first because white text won't show on the white background the move box will disappear when you select the rectangle selection tool
Posts: 9,747
Threads: 234
Joined: Dec 2008
The "Move" tool is to the left of the rectangle selection tool
The next step is to fill the background color. Click on the colors at the bottom of the tool bar (I am being crude because it is faster)

When you click on the color (In this case I will click on the red) a window will come up and you can select from all of the colors available in windows
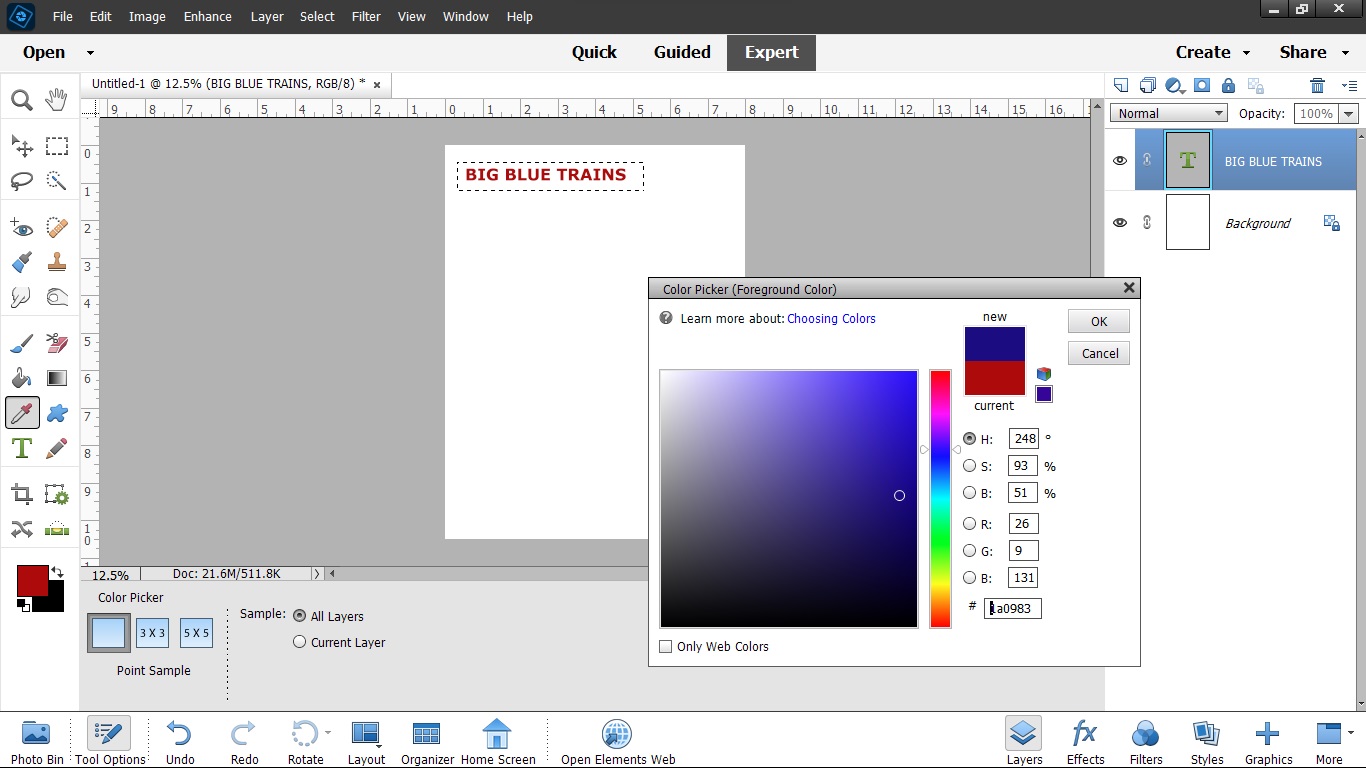
I selected the blue and click OK. Now I select the paint bucket (there is a tolerance selection for the tool which allows it to select shades close to what you are painting, or very precise as to the color it replaces. Here we want to replace the white background with blue. First the image has to be flattened which merges the layer that has the text on it with the background picture
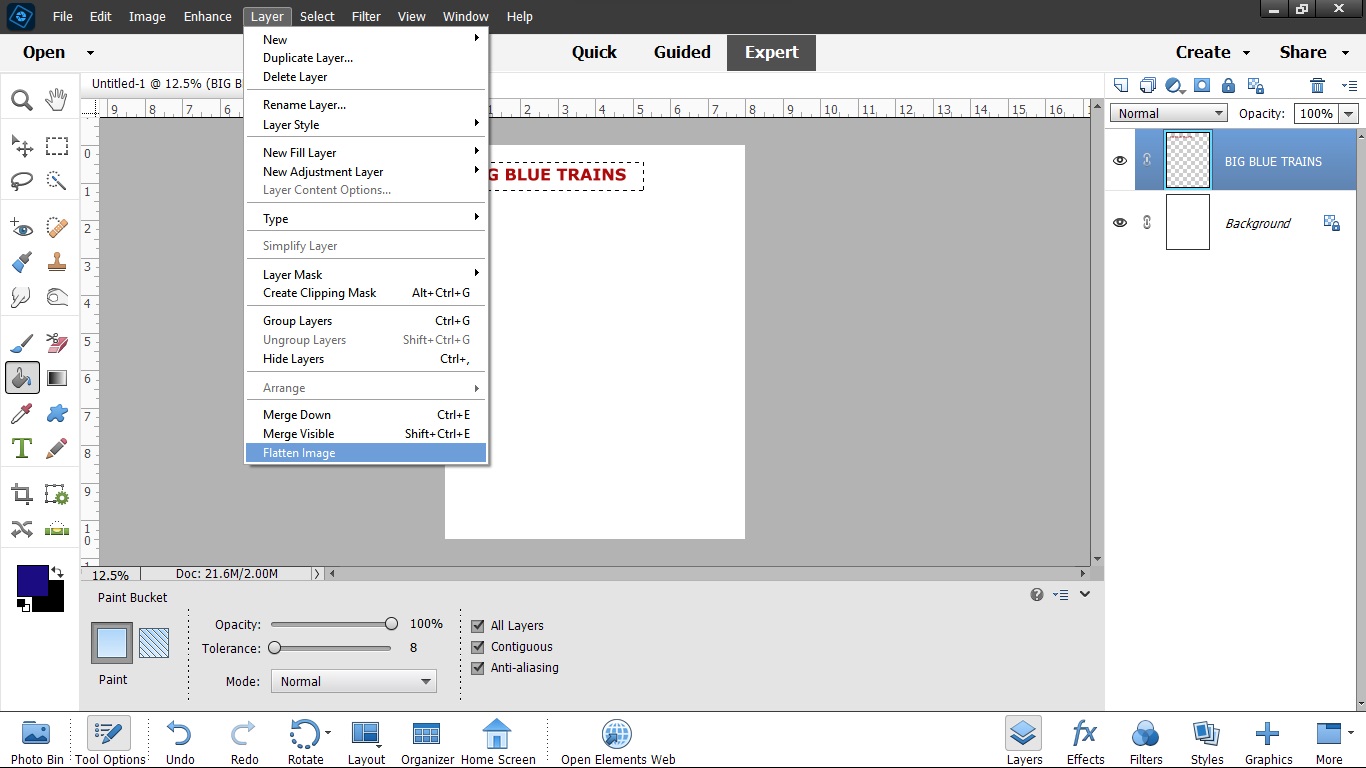
place the paint bucket inside the selection box and click to fill around the red text. There will be letters like B G etc that have centers that don't fill
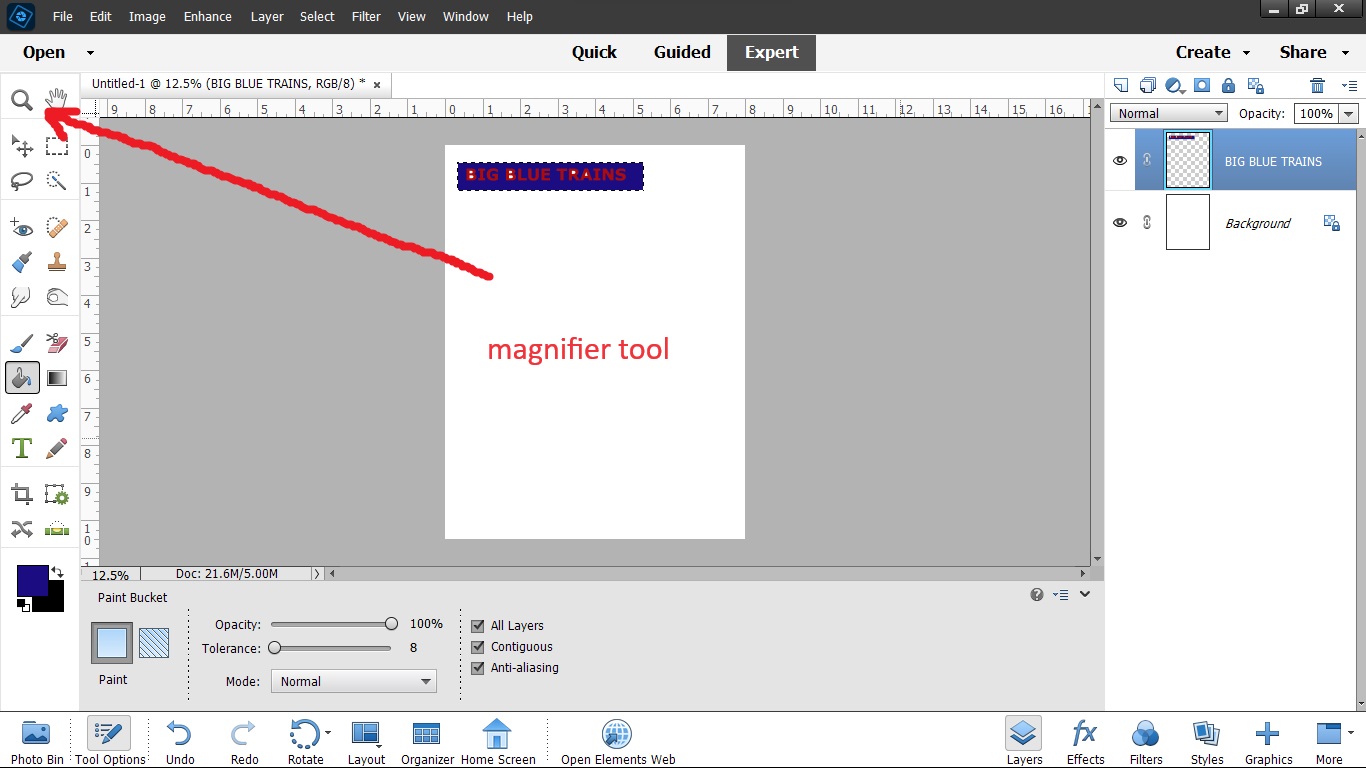
Click on the magnifier (+ or minus can be selected at the bottom of the tools) and enlarge the selection then fill in the letters with the paint bucket tool

Posts: 9,747
Threads: 234
Joined: Dec 2008
After all the letters are filled with the blue select the color picker tool once again and choose white ( if you put the cursor over the white in the photo an eye dropper will appear and you can select the exact shade by clicking that and selecting OK .

Now fill the letters in with white
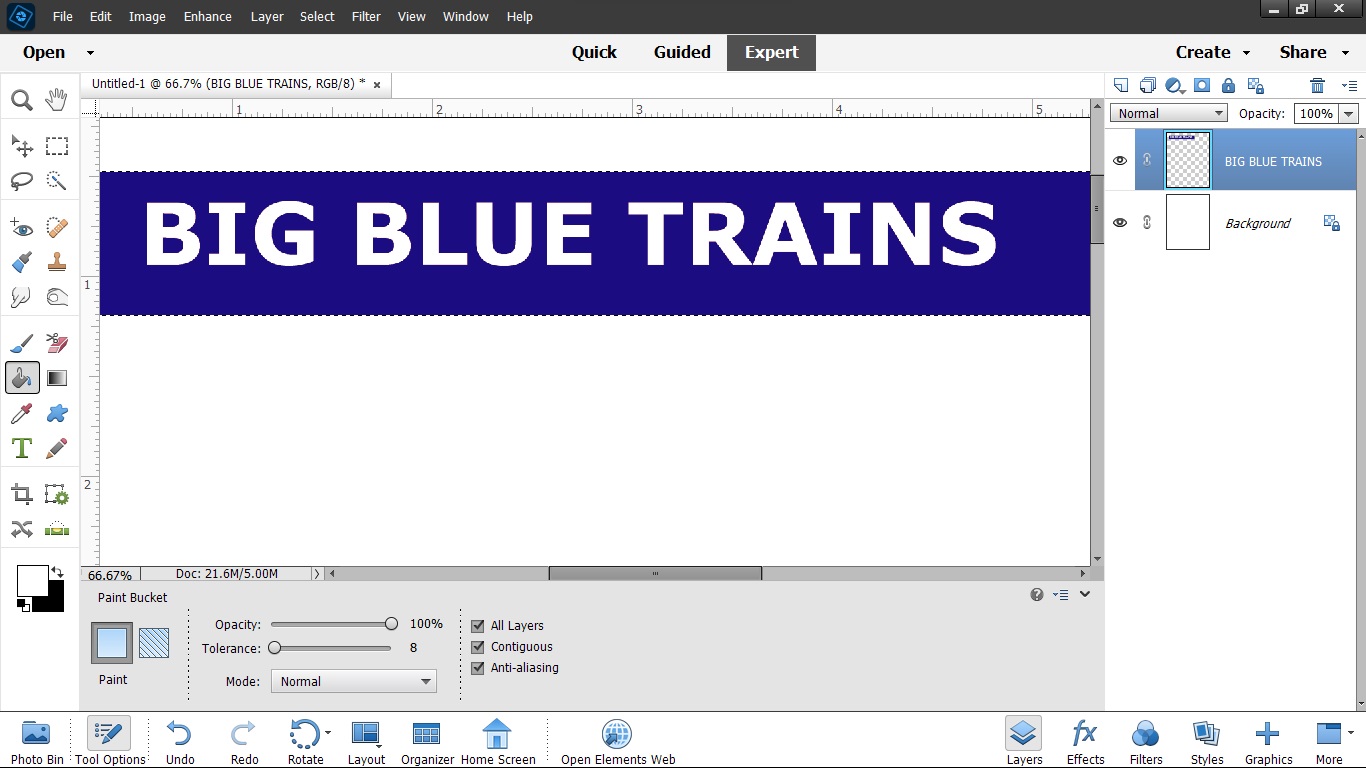
There is another way to change the letter color but this is fast enough unless you have a lot to do. I tried to make this as simple as I could because I knpw the learning curve is steep, but once you get the feel of it it becomes easy and the more you do the more you discover.
More to come
Charlie


