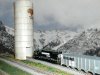
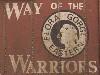
There will be a new industry on the W.C. & T. RAILROAD producing some of KY.'s finest Bourbon. They have discovered a method to use the Flux to produce what they call MaltFlux. It is claimed to improve the flavor and aging time to improve the product.
This is the start of 4 new cars for the industry (N-Scale) The first 2 are a tank can and a gondola. They have only been painted and decaled so far. I need to figure out something on the ladders on the tanker as it hides the sign of MALTFLUX. Any ideas? The gon has gear sign stating RAW FLUX, any body know the correct color of raw flux? Weathering, new trucks and couplers will come later.
I tried the show thing but was not very successful compared to other people there so I thought I would try and see if anyone wanted any of it here .
Bachmann train set locomotives
CN GP 40 road number 5075
runs well , no broken parts I am aware of
$8.00
UP F Unit (F7 or F9) road number 1206
Front coupler broken $4.00
SF B37 some scratxches and broken front hand rail.
$4.00
Sf FT Unit no road number
$4.00
Model Power
CP road number 4500 Alco 630
has broken rails, been converted to Kadee couplers
$4.00
Life Like
SF F7 no road number, never used was received as a gift and placed in round house near mint.
44.00
Lionel Ho Scale from the 70s
CP GP 30 road nuber T-12020
broken hand rails
$4.00
Athearn Blue Box kits not DCC
SP GP 40 road number 7959
missing detail parts but has handrails , flywheel drive system
$16.00
B&O GP 30 road number 3509
Metal trucks, flywheel drive, handrails intact
$8.00
Cotton Belt Sd40T-2
Road number 8326
all details added , handrails intact, flywheel drive system
$20.00
B&O S 12 shell, 42.00
UP GP7 shell $2.00
Custom Painted S12 shell $2.00
frame and powered metal trucks for SW 9/1200 no drive grear, just trucks and shell $5.00
SF FB unit shell $2.00
Rolling stock
Athearn blue box kit cars built, some have couplers , some do not
PRR Streamlined Vista dome car $5.00
Wabash 86 Foot 4 door Hi Cube Box Car $7.00
NYC SL Baggage car $5.00
Seaboard 4 door auto parts car.The Courteous Service logo $4.00
Seaboard 4 door auto parts car, SCL logo $4.00
ST. Louiswestern 4 door auto part car, Blue Streak Cotton Belt Logo $4.00
Greant Northern 4 door auto parts car, red in colour $4.00
Covered Hoppers
Sanata Fe $4.00
MKT $4.00
D&RGW $4.00
B&O 40 foot High cube box car metal trucks, with springs $4.00
Milw Refrigeration car $4.00
Walthers
B&O 40 foot Boxcar $4.00
Round House
Rock Island 50 foot plug nose boxcar $5.00
Stewart
70 Ton 12 panel tripple hopper car $3.00
Decals
CDS rub on transfers
Canadian Wheat board 3 sets , 75 cents each
CP rail road switcher 1 set 75 cents
TH&B caboose 2 sets 75 cents each
NAR Locomotive 1 set 75 cents
CP rail Bathtub Gon 1 set 75 cents
CP rail Hearld King Flat car wet decals 2 sets 75 cents each
or you can have all 10 sets for $5.00 including shipping on them.
willing to deal on just about anything. If you think I might like your price better , make an offer.
Shipping will be by Canada Post at the lowest rate to keep costs down.
All prices are in US Dollars. Willing to aceppt trades. Perfer Canadian Road Names. Money orders from the USA must be the International money orders as all others cannot be cashed here.
I accept paypal, I do not charge for packaging or for anything else but actual postage costs.
Any questions please ask and I will try and answer them in a quick turn around
Pictures upon request.
Thanks for any interest, and please buy so i can clear the storage yard out
Stuart Warren
Renfrew ontario
Western Shipping is scratch-bashed (mostly bashed) out of Walthers Hardwood Furniture.
Painted with a "texture" paint spray bomb to give a stucco over brick/concrete look. Some windows and doors blocked with brick texture styrene that was painted by my 7 year-old. Roof is "bird grit", a fine gravel that takes stain well, since it is absorbant. The lettering is from an acrylic stick-on set, affixed to a scratch-built frame. Figures are prepainted Woodland Scenics.
The whole thing rests on a 100-thou styrene sheet from a bus sign, and is about 3 1/2 feet long over all. Custom sized and fitted to go in a triangular space against a wall. Built for a friend whose layout was part of the Niagara Frontier Region/NMRA conference in Ottawa in Spring 2008.
This will be my running thread for my layout. My layout will be inspired by the Waynesburg Southern, a piece of the Norfolk Southern trackage that runs from Waynesburg, PA down into West Virginia and serves Federal #2, and Blacksville #1 and 2 mines. A link to the history of the rails can be found here: <!-- m --><a class="postlink" href="http://www.wvrail.railfan.net/mga_past.html">http://www.wvrail.railfan.net/mga_past.html</a><!-- m -->
…and Union Pacific fans shouldn’t get too excited, as that is neither a spelling error nor anything to do with that road’s largish articulated locos.
Several years ago, my good friend cn nutbar was musing about the possibility of having me create a model of one of the CNR’s T-3-a locomotives. These were ten USRA Light 2-10-2s acquired, second-hand, from the Boston & Albany in 1928, not too long after that road had received their noteworthy A-1 Class 2-8-4s. He had an article in the CN Lines magazine of the CNR sig that gave a short history of the locos, along with some photos of the prototype and a pair of photos of a nicely-done model by John Williams, using an old Akane USRA 2-10-2 - not a model that you come across too often these days.
I felt that if we could find a suitable loco to start with, it could be done. Bowser offered a 2-10-2, but the wheelbase was too far off, and the entire boiler was wrong. The only other 2-10-2s available were in brass, and not too plentiful even then.
The topic of this loco would come up periodically, and I joked that if we ever did get started, as soon as we had acquired the loco, at least one manufacturer would immediately release a suitable 2-10-2, and at a reasonable price, too. This actually happened: Bachmann came out with a USRA Light 2-10-2 a year or so after the project got underway, followed by another, less suitable but useable, version from IHC.
Anyway, I was in a hobby shop one day and they had (gasp!) a used Akane USRA Heavy 2-10-2. I had always felt that their version of the “Heavy” looked closer to what we wanted, so I called Mister Nutbar to apprise him of my discovery, and the loco was quickly purchased.
While it was painted and lettered for a free-lance railroad, and had the incorrect “Long” tender (with a water scoop, no less!), it had also been remotored with a large Sagami can motor and ran very well. On its first test run on my layout, it made a trouble free loop almost around the room, but as it exited the lift-out bridge across the entrance to the layout and headed into the curve between the buildings of GERN Industries, the lead set of drivers derailed. However, loco and train continued on, unfazed by what appeared to be imminent disaster. At the first turnout, and without hesitation or faltering, the wheels re-railed themselves, and the loco and train carried on as if nothing had happened. “That’s some loco”, I commented, “It’s a real ‘Beeg Boy’ - nothing bothers it!”. From that point on, we referred to the loco as “Beeg Boy”.
It took some time to acquire all of the parts necessary for the conversion work, but I finally got started on the project. Some things were pretty straightforward, while others, such as the ash chutes under the firebox, had me stumped for a while. The whole project, not too far advanced, ground to a halt for a year while I did a house renovation for someone, followed by almost another year that I just couldn’t get any enthusiasm for this job. I tinkered with it off and on, and finally the fire was re-kindled. From that point on, work went rather quickly, and the solutions to problems seemed to come easily. I kept making excuses to Mister Nutbar that the project was still stalled, though, as I was worried that I’d “run out of gas” before I got done. That, fortunately, didn’t happen, and today , when he arrives here to pick up two other locomotives that I’ve repainted for him, I hope that he’ll be pleasantly surprised when I also reveal the finished results of this long-delayed project.
What follows is not a “how-to”, but rather a chronicle of the construction process.
This is a scan of a page from the October 1983 issue of Mainline Modeler, showing one of the prototypes of the loco that we’re hoping to end-up with. The photo is from the Charles T. Felstead Collection.
Here’s the loco as we found her, although the original tender is not shown. It’s in the paint stripper, while the tender shown is the Bachmann replacement that I’m going to modify for use with this loco.
One of my first tasks was to cast a new boiler weight from lead, as the original was too small. With the large can motor, the loco was severely back-heavy. (Probably the reason why those lead drivers derailed.)
After stripping the paint from the loco, I used a propane torch to remove the original cab and pilot from the loco. The original wheelset in the lead truck was replaced with a spoked set from PSC, then I used a cut-off disk in my Dremel to cut a slot in the boiler in preparation for the installation of the new cab.
The new cab, an old Kemtron cast brass kit, was picked up in a box of train goodies bought by my wife at a garage sale for $5.00. (There was a lot of other neat stuff in that box, too -a real find!) I assembled it using the torch, then used the torch again to attach it firmly to the loco.
Here’s the running gear as found. The trailing truck is missing part of the equaliser on this side, and the original pilot wheels are still in place.
One of the distinctive details of this loco are the ash chutes under the firebox. I used square brass tubing, soldered to the loco’s frame, for the main chutes, then fabricated the doors from styrene and wire. Unfortunately, they are not as solid as they might have been had I used brass, but with 19 pieces per door, I felt that they were beyond my capabilities with a soldering iron. I did fabricate the missing part for the trailing truck and soldered it in place.
I fabricated a new pilot deck, altered the frame, then modified a brass CNR-style pilot to accommodate a Kadee coupler. (Mister Nutbar had bought a number of these from a brass importer some years ago - this is the last one that we have.) Everything was soldered together using a 200 watt iron, then the coupler lift bar and stanchions, flag holders and a new air tank (built from lead-filled brass tubing, with .010”x.030” brass strip used for tank bands) were soldered to the assembly.
After this, the project was put on hold for a while. As I mentioned, this dragged on much longer than intended. When I finally did get re-inspired, it was with a vengeance, and , as you’ll see from the photographs, the work went on almost without break, at least for taking photos.
Here’s the engineer’s side of the re-detailed loco. Parts added include the cab handrails, etched brass cab numbers, a new starter valve (in front of the cab), and a new power reverse. The generator was moved forward to allow installation of the scratch built turret cover, and new sander valves and pipes were added to the sand boxes, along with grabirons. The original water delivery pipe was re-routed to a new top feed check valve, and some boiler washout plugs were installed. You can also see the new brake shoes and hangers added to all of the drivers, as the original brass ones had been removed by the previous owner.
On the same side, but farther forward, you can see the top feed check valve, sander pipe and valves for the forward sandbox, and the lagged steam pipe from the dome forward to the smokebox front. The new air tank is another fabricated from lead-filled brass tubing.
On the fireman’s side, the same cab and boiler details are seen, along with a new cold water pump (closest to the cab) and cross compound air pump, both with their associated piping.
Here the continuation of the cold water line to the feed water heater can be seen, along with the lagged hot water line from the heater to the top feed check valve. There’s yet another lead-filled air tank snuggled under the running board, and the new handrails can be seen as they work their way down the smoke box front.
Here are a couple of front angle views. In the first photo, the steam pipe for the Barber-Greene snowloader is lagged right to the end. I later removed the lower lagging, as the bottom couple of feet of the pipe appear to be connected to the main pipe with a swivel joint. Also seen here and in the previous side views of the front end are the exhaust steam pipes from the steam chest to the feed water heater, along with the condensate drain pipe on the front of engineer’s side of the smoke box. The large heater bundle (from Cary) is supported on a Cal-Scale bracket which was customised with curved overlays cut from brass shim stock. Beneath that is a CNR-style number board built up from styrene - it’s attached to the smoke box front with brass rods soldered into the smoke box. The headlight bracket and headlight are from Cal-Scale and the combination class lights and handrail stanchions are also modified Cal-Scale parts. The plastic steps from the pilot deck to the running boards are from the scrapbox, and are pinned in place with brass rods.
The vents on the cab roof were in the wrong place, so I used a mill file to remove them, then added new ones built-up from sheet brass. Brass sheet was also used to increase the height of the wind deflector that was cast on the back edge of the roof. The roof itself was made to be removable, as it’s difficult to install window “glass” in closed-in vestibule cabs. The turret cover was built from sheet styrene, and is secured to the boiler by brass rods soldered into holes in the boiler top. The hollow turret cover was then filled with epoxy, solidly bonding it to the boiler. The round access covers were punched from styrene, and handles and grabs were made from .012” brass wire, similar to those on the sandboxes.
The three views below show the piping and details along the upper part of the forward portion of the boiler and smoke box. The airline for the bell ringer, along with the steam exhaust lines from the air-and water pumps come out from under the boiler lagging. The latter two go to the heater bundle.
EDIT: In attempting to re-insert the photos into this post, I ran into limits on the numbers of photos, and due to other constrictions of this site, needed to split the post into two.
In an attempt to keep the second part in-order with the first, I've taken the liberty of co-opting fsm1000's post, the first reply, to include the balance of the Beeg Boy re-build.
My apologies to Stephen (fsm1000), who hasn't visited Big Blue since 2009, just in case he returns.
I also can't seem to remove the last two pictures, which appear at the end of this post, below.
Boy, I tell ya, I knew N was going to be a little different, but jeez. I installed a decoder into an engine last night, and lost the screws for the couplers twice, in high carpet. Luckily, I have a strong magnet. Them couplers are s-m-all. I soldered some feeds to the rails tonight for the first time. Those are going to have to be hidden. You can't hide these wires under ballast like HO. Is soldering common in N for feeders? I've heard the terminal rail joiners aren't the best. Wondering what you all do. I will have some pictures of the layout and start a thread for it after I get the track all laid, probably sometime at the end of next week. Thanks.
In my thread on Lima...in the Photography section...I included a little bit on the Lima Locomotive Works...which has me thinking...
What interesting shippers (real shippers) do you know of, but have never seen modeled?
Lima seems pretty cool to me...an army tank plant, a refinery, and a Steam locomotive builder all in close proximity. Both the Locomotive Works and Refinery were accessed directly from the Nickel Plate's yards.
I've never seen an army tank plant modeled...numerous materials in...and army tanks on flat cars out! Awesome.
Steam Locomotive (or diesel) builder...material in...many steam locomotives out. How else can one justify having Southern Pacific 2-8-8-4s and 4-8-4s, C&O 2-6-6-6s, NKP 4-6-4s, shays, and (insert other famous steam here) on your layout...without modeling such a railroad? I personally think a string of 2-8-0s is a pretty cool freight train. Modeling ALCO would allow 15 of Monogram's 4-6-4 & 4-8-8-4 kits to be a freight train! So cool.
A car builder would also be a cool industry...but I'd prefer a locomotive manufacturer...especially since we modelers tend to have an unprototypically high locomotive-car ratio.
What other undermodeled industries can you think of?
OK its not that bad. However, I want to change the 1.5 volt bulb (rear lamp) in the cab of my little switcher to an LED. I need some instructions or help on how to dis-assemble the cab from the body in order to get to the bulb which is up in the cab roof/ceiling. Information on how to do this is scant on line or only partially helpful. Is there a way to remove the cab from the rest of the shell? I can see how it might come apart however, I do not want to do anything stupid which will ruin a perfectly good little engine.
Now. I know I can get a drop in decoder from NCE that has resistors which will allow me to use the 1.5 bulb without going through the hassle of attempting to do all this work in the first place. I would however like to change the bulb to an LED anyway as they will last longer and they also look better IMHO.
I'm pretty sure a couple of dudes have this loco and may have already done this.